As an Amazon Associate, I earn from qualifying purchases
Are you looking for how to remove a Moen kitchen faucet with spray? We’ve covered you if you’re ready to upgrade or repair. A Moen kitchen faucet with spray may be taken out in a few easy steps, and the procedure is simple. Whether you’re experiencing leaks or want to install a new faucet, this guide will give you the essential instructions to tackle the task efficiently. Get ready to say goodbye to your old faucet and hello to a fresh, updated look in your kitchen. Let’s dive into the easy-to-follow process of removing a Moen kitchen faucet with spray.
What Is a Moen Kitchen Faucet?
A Moen kitchen faucet is a plumbing fixture produced by Moen Incorporated, a widely recognized brand specializing in faucets, showerheads, and other products. Moen is known for its quality and innovative designs, offering various styles and features to suit various kitchen décors and needs.
A Moen kitchen faucet may include hands-free operation, pulldown/pullout spray faucets, spot-resist stainless finishes, or MotionSense technology that detects movement to activate water flow. The brand emphasizes durability, performance, and aesthetics in its kitchen faucets.
When To Remove a Moen Kitchen Faucet
There are a few reasons why you might need to remove a Moen kitchen faucet:
Replacement: Over time, even high-quality faucets like Moen can wear out or start to look outdated. If the faucet leaks, has reduced water flow, or you’re updating your kitchen and want a newer model, it’s time to remove and replace it.
Repair: Some issues, like a persistent leak, may require you to remove the faucet for a thorough inspection and repair. Sometimes, accessing and fixing a problem is more accessible by removing the faucet entirely.
Relocation: If you’re renovating your kitchen and changing the layout of your sink area, you may need to remove the faucet to install it in a new location.
Essential Tools and Materials
To remove a Moen kitchen faucet, you will need the following tools and materials:
Basin Wrench or Channel-lock Pliers: These tools will help you remove the nuts that secure the faucet to the sink.
Screwdriver: A Philips or flat-head screwdriver might be necessary to remove some parts of the faucet.
Plumber’s Tape or Thread Seal Tape: Useful for preventing leaks when installing a new faucet.
Bucket and Rags: These will come in handy for catching water that might spill out during the process and for cleaning up afterward.
Towel or Sponge: For cleaning the area where the old faucet was removed before installing the new one.
Remember to turn off the water supply before you start to avoid unnecessary mess and water waste. It’s also a good idea to take pictures during disassembly to remember how everything fits together.
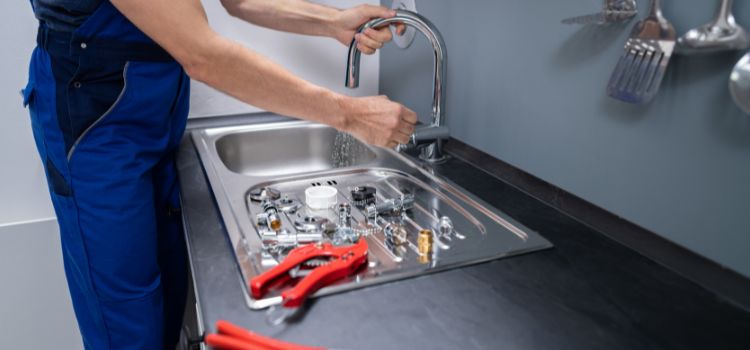
How To Remove an Old Moen Kitchen Faucet
Before removing your old Moen kitchen faucet, ensure you have the right tools. It would help to clear the area under the sink so you have enough room to work. Here’s a general step-by-step guide:
Turn Off the Water Supply: Locate the shut-off valves for hot and cold water under the sink and turn them clockwise to the off position.
Disconnect the Water Lines: Disconnect the water supply lines from the shut-off valves using a basin wrench or channel-lock pliers.
Remove the Mounting Hardware: From underneath the sink, remove the nuts or mounting hardware that secure the faucet to the sink. A basin wrench is usually the perfect tool for this.
Lift Out the Faucet: Lift out the old faucet from above the sink. You may need to twist or wiggle it slightly to free it from old caulking or plumber’s putty.
How do you remove a kitchen faucet sprayer: Step-by-Step Process
A Moen kitchen faucet with a sprayer will have an additional hose that needs to be disconnected. Here’s how you can remove it:
Follow Steps 1 to 3 Above: The initial steps are the same as removing a regular faucet.
Disconnect the Sprayer Hose: The Sprayer will be connected to a hose, usually secured with a threaded connection or a quick-connect clip. You must unscrew this or release the clip to disconnect the hose. Be prepared for a small amount of water to spill out when you do this.
Remove the Sprayer from the Sink: The Sprayer may be held in place by a nut or clip under the sink. Remove this, and you should be able to lift the Sprayer out from above.
Follow Step 4 Above: With all connections and mounting hardware removed. You should be able to lift out the central part of the faucet.
How To Remove Moen Kitchen Faucet Handle?
The process for removing a Moen kitchen faucet handle varies slightly depending on the model, but it generally follows these steps:
Locate the Set Screw: The set screw is usually hidden under a cap on the handle or at the rear of the handle.
Remove the Cap: If there’s a cap, carefully pry it off using a flat-head screwdriver.
Unscrew the Set Screw: Use an Allen wrench to turn the set screw counterclockwise until the handle can be lifted. Be careful not to strip the screw.
How To Remove Moen Kitchen Faucet Cartridge?
The cartridge is a part of the faucet that controls water flow and temperature. If you’re having leaks or temperature control issues, you may need to replace this. Here’s how you can remove it:
Remove the Handle: Follow the steps above to remove the faucet handle.
Remove the Cartridge Retainer: Once the handle is removed, you should see a nut or clip that’s holding the cartridge in place. Unscrew the nut or remove the clip.
Pull Out the Cartridge: You should be able to take the cartridge out directly after removing the retainer. Moen makes a cartridge removal tool that can help if it’s stuck.
The water supply should always be turned off before beginning any plumbing repair. Also, placing a towel or bucket under the work area is a good idea to catch any water that might spill out.
Kitchen Faucet Removal Problems Common Issues
Several common issues can complicate the removal of a kitchen faucet. These include:
Corrosion and Rust: Metal parts can corrode or rust over time, making them difficult to remove. This can require extra effort or penetrating oil to loosen them.
Hard-to-Reach Nuts: The nuts that secure the faucet can sometimes be hard to reach, especially in tight spaces. A basin wrench can help with this.
Stuck Cartridge: Removing a jammed cartridge from a faucet might be difficult. A cartridge removal tool can be beneficial in this case.
Water Shut-off Valves Won’t Close: If these valves are old or corroded, they might not fully close, which can lead to a water leak when you disconnect the faucet. If this happens, you may need to shut off the main water supply to your home.
Removing, Cleaning, and Maintenance Tips
When removing a faucet, keep these tips in mind:
Your faucet’s lifespan may be increased with regular cleaning and maintenance. Wipe it down regularly to prevent mineral buildup, and use a gentle cleaner that won’t damage the finish. If your faucet has a sprayer, occasionally remove and clean the aerator to prevent clogs.
Replacement Faucet
When choosing a replacement faucet, consider the style of your kitchen and your needs. If you liked your old Moen faucet, stick with the brand. Also, consider features like a pullout or pulldown sprayer, touchless operation, or a built-in water filter.
Installation
Installing a new faucet can be straightforward if you’re handy. Here’s a general guide:
Prep the Area: Clean the area where the old faucet was removed. Remove any old plumber’s putty or caulk.
Insert the New Faucet: Place the new faucet into the holes in the sink.
Secure the Faucet: Install the nuts or other hardware underneath the sink to secure the faucet.
Connect the Water Lines: Connect the hot and cold water lines to the appropriate valves. Use the plumber’s tape on the threads for a better seal.
Test the Faucet: Turn the water supply back on and test the faucet. Check for leaks and ensure the hot and cold water is connected to the right sides.
Conclusion
In conclusion, removing a Moen kitchen faucet with a spray can be a manageable task. You can easily replace or repair your kitchen fixture with the right tools and a systematic approach. Remember, it’s all about taking it one step at a time. Armed with this guide, you can confidently and efficiently tackle your Moen kitchen faucet with spray removal. Breathe new life into your kitchen with your newfound plumbing skills. Happy DIY-ing!
FAQs
Locate the hot and cold water shut-off valves under your sink and turn them clockwise to the off position.
The Moen sprayer is connected via a hose, typically secured with a threaded connection or quick-connect clip. Unscrew or release the clip to disconnect.
Unscrew the nozzle counterclockwise from the end of the faucet. Some may require a wrench if they are too tight to remove by hand.
First, remove the existing faucet and disconnect the Sprayer. Then, install the new faucet, and connect the new Sprayer according to the manufacturer’s instructions.
Disconnect the wand from the hose by unscrewing it, typically counterclockwise. Depending on the model, you may need to depress a button or release a clip.
Essential tools like a basin wrench, screwdriver, and Allen wrench should suffice. For some tasks, a cartridge removal tool might be helpful.
Leave a Reply